As a newbie in the world of Hackers, or a returning veteran seeking to get reacquainted, it is important to be aware of the basic game functions and play. Use this guide to explore and clarify the beginning stages of the game, from choosing a name and building key nodes to expanding and upgrading the network and finding targets to hack!
Getting Started[]
Upon installing the game, a large empty space reveals the familiar Ergo Light background. This is the space in which networks are visualized and managed.
To create a new account, tap the button in the center of the screen. Previously created accounts can be retrieved by tapping the “Connect” button in the top right corner.
If the option to “Connect Automatically” is enabled in Google Play Games or Game Center, any network connected to the Google or iTunes account will load instead, bypassing this initial screen. To create a new account in this case, the option must first be disabled in the settings menu of Google Play Games or Game Center, respectively, and the game must be reinstalled. The initial account creation screen should then appear upon loading the game.
Installation[]
Choosing a Name[]
After selecting to start a New Account, a prompt will appear requesting a hacker alias. Use the on-screen keyboard to input a username. Names do not need to be unique, so any name may be chosen. Curses, racial or sexist slang, and other obscenities will be converted to asterisks (*), and any name including these is strongly discouraged. Confirm the network name to continue.
Choosing a Location[]
Next an IP location must be chosen. This location will be the basis of the leaderboard scores, so choose accordingly! Both the network name and IP location can be changed at a later date; however, names can be changed only once, and there is a 25 credit fee for each IP relocation.
Once the location is confirmed, a new network will appear! The chosen name will appear in the top left corner. Congratulations! Welcome to the network!
Network Interface[]

Your new Network!
Your new Network! This is the Home Screen, where the network is managed. The network name and level are displayed in the top left corner. In the top right corner, there will be three indicator bars - one Gold, one Red and one Silver. These display available Resources. The Gold bar represents money ($), the Red bar represents B-coins (฿), and the Silver bar represents Credits (¢). These resources each serve unique functions within the network.
The visualized network lies in the center of the screen. At first, there will be four structures, called "Nodes". Nodes perform a variety of functions, such as producing resources, storing hacking programs, and defending the network against other hackers.
- The center node is the Core. The Core holds a relatively small amount of money and b-coins.
- The node in the top right is a Server Farm. Server Farms produce money!
- The node at the bottom is a Program Library. These store the viruses (programs) used to hack other networks.
- Finally, the small red node in the top left is a netConnection. Netconnections are the starting points when initiating a hack, and all intrusions will begin here.
Building Your First Node[]

Your first Node!
Your first Node! It is not long before someone is preparing to attack! To protect the network, the first task is to build a Sentry. Sentries are extremely useful nodes which install an "antivirus", allowing nodes to strike back at anyone attempting to hack the network! Nodes are purchased from the "Build" menu found in the bottom right corner of the Home Screen. Tap the icon to open the menu. There are three different types of nodes - Business, Security and Hacking - found by selecting the appropriate tab at the bottom of the menu. Each node has a construction cost displayed at the bottom of its purchasing card. Select the Sentry, which is highlighted, and tap "Buy". The menu will automatically close and a new Sentry will appear in the network!
Nodes take time to build and upgrade. The Sentry just purchased takes a minute to finish building. Any network process can be instantly completed by spending relative amounts of credits. To instantly finish building the Sentry, tap to select it, and then tap the "⏩" button. This will use the amount of credits displayed and the Sentry will be completed immediately.
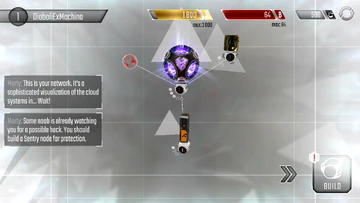
There is a surprise in store, however! Once the Sentry is built, an intruder will commence a hack! Note that in actual gameplay, hacks cannot be viewed in action, but only via replays.
Defending Against Hacks[]
All hacks start from netConnections. Once the attack begins, watch the Sentry carefully. Black spheres, or “pulses”, will move from the Sentry to the Program Library. These are packets of antivirus spreading through the network. Once the antivirus is fully installed, the base of the Program Library will turn completely black. It is now secured with an antivirus! The Program Library will receive a final, larger pulse and then begin spreading the antivirus itself.
Nodes with an antivirus will attack any adjacent nodes that have been captured by an attacker. The antivirus on the Program Library will now start defending the network by working to recapture the Core.
Secured nodes will continue to spread the antivirus to other nodes. The pulses will now move from the Program Library to the Core. Once the Core is recaptured, it will be immediately secured and ready to receive the final pulse from the Program Library. Then it will begin firing on the captured Server Farm!
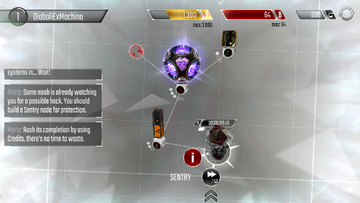
After seeing hacking in action, it's time to take revenge!
Hacking[]
Retracing an Attack[]

Your first Retrace!
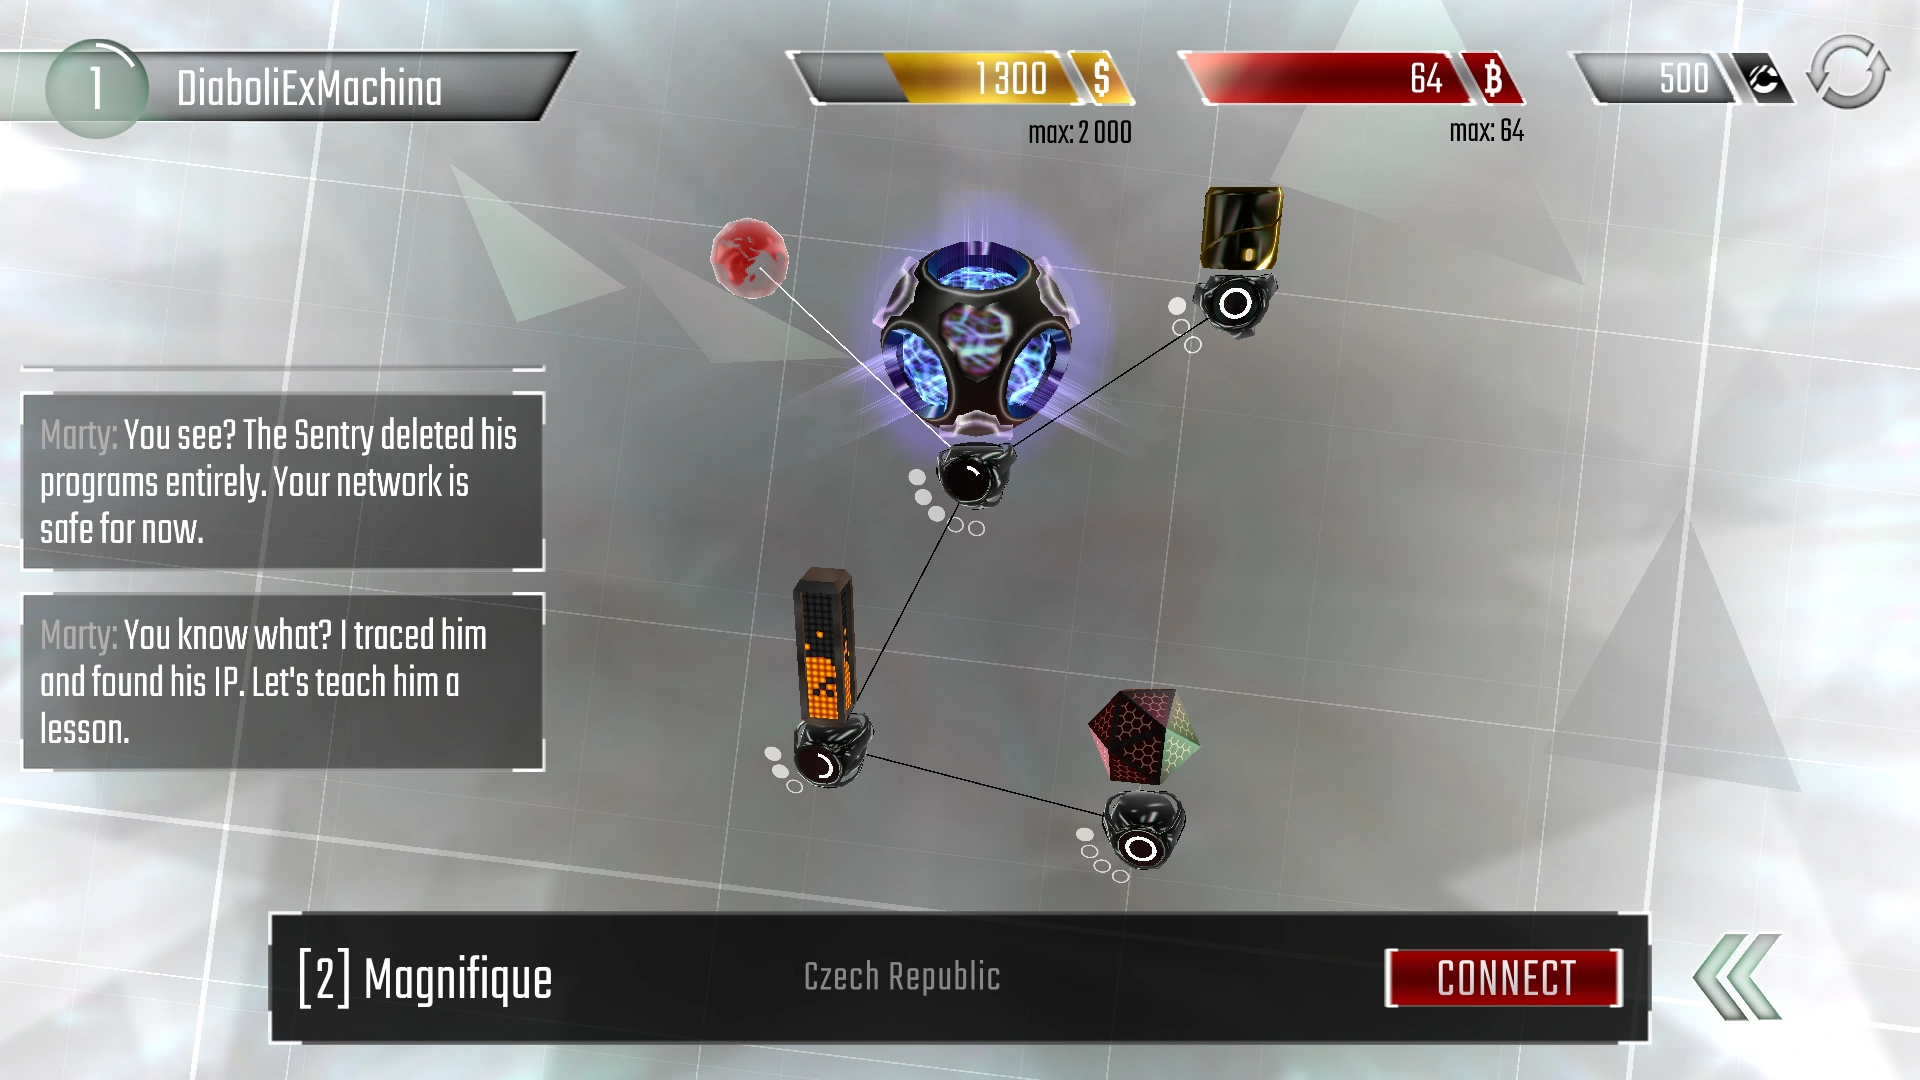
Your first Retrace! Once the attack is successfully defended, click the "Connect" button to retrace the intruder! Note that any hack attempt which activates the network security can be retraced, regardless of the outcome.
Attacking a Network[]

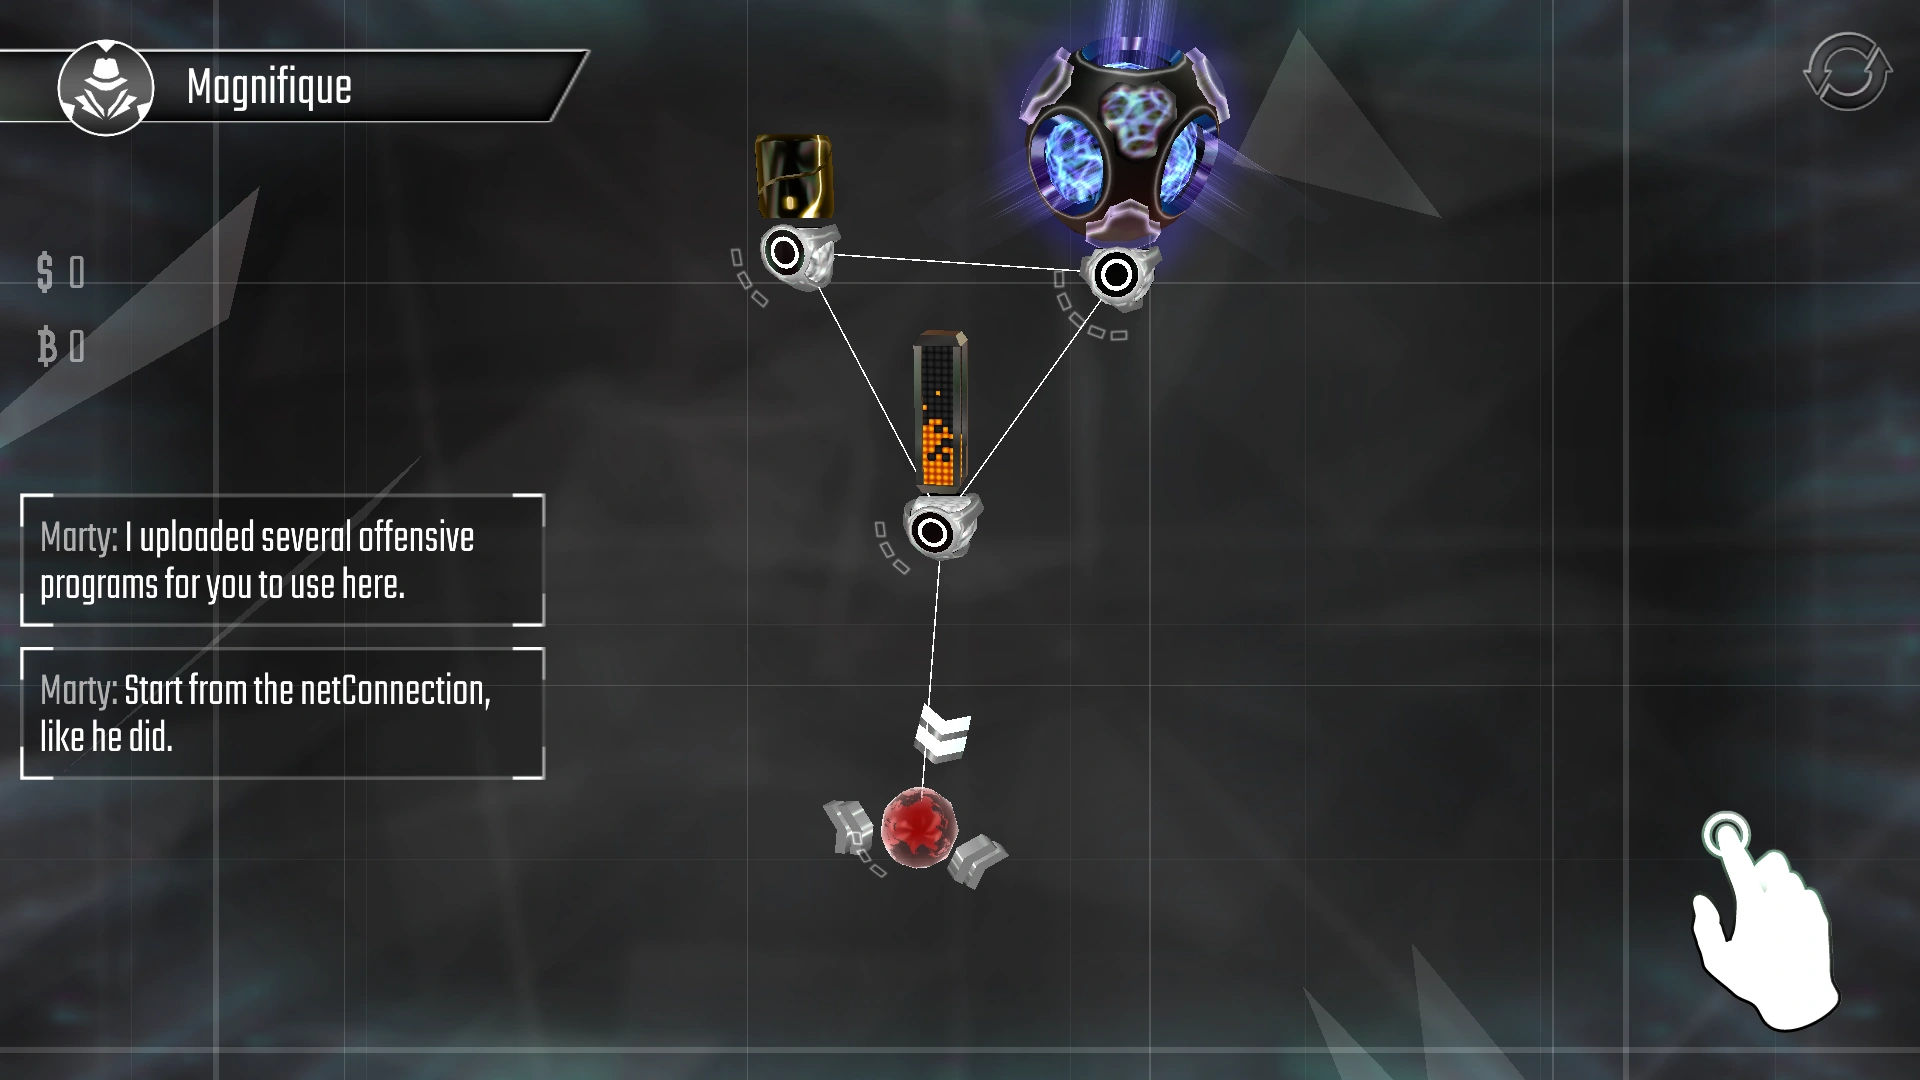
Attacking a Network!
Attacking a Network! Like the attacker, the hack must start from the netConnection at the bottom of the screen. Select it to see which programs are available. Right now only one virus is available - Beam Cannons. These programs target one node at a time, and focus on it continuously until it is captured. Tap the Beam Cannon icon to install it onto the selected netConnection, and watch it attack the Program Library.
Installing more programs will multiply the strength of the attack, but take note of the small rectangles around the base of each node. These are Program Slots, which represent the number of programs allowed on each node. Empty rectangles represent open slots ready for a program, and they will become filled as programs are installed. If a program is installed on a node when all the program slots are full, it may overwrite a program with lower priority, or it may not install at all.
Once the Program Library has been captured, select it and install your Beam Cannons on it. Programs will target nodes in a certain order with higher priority nodes being targetted first. In this case, the Core has the highest priority. Once it is captured, the Core database will begin downloading automatically, and the Beam Cannons will begin attacking the Server Farm next.
Fully downloading the Core on player networks is a Win Condition which rewards Reputation, and it is a Requirement in order to complete Missions. Once the Server Farm is captured, some of the Resources stored there will begin transferring automatically, and will be available upon disconnecting to the Home Screen.
Congratulations! The spoils of the cyberwar can now be used to improve the network by building and upgrading nodes!
Net Building[]
Expanding Your Network[]
Most nodes require money to build and upgrade. However, the specialized hacking nodes and programs require B-coins to purchase and upgrade, so it is important to build a B-coin Mine. Build it the same way as the Sentry, by pressing the "Build" menu button in the bottom right corner, selecting the B-coin Mine card, and tapping "Buy.”
Arranging Your Network[]

Arranging your Network!
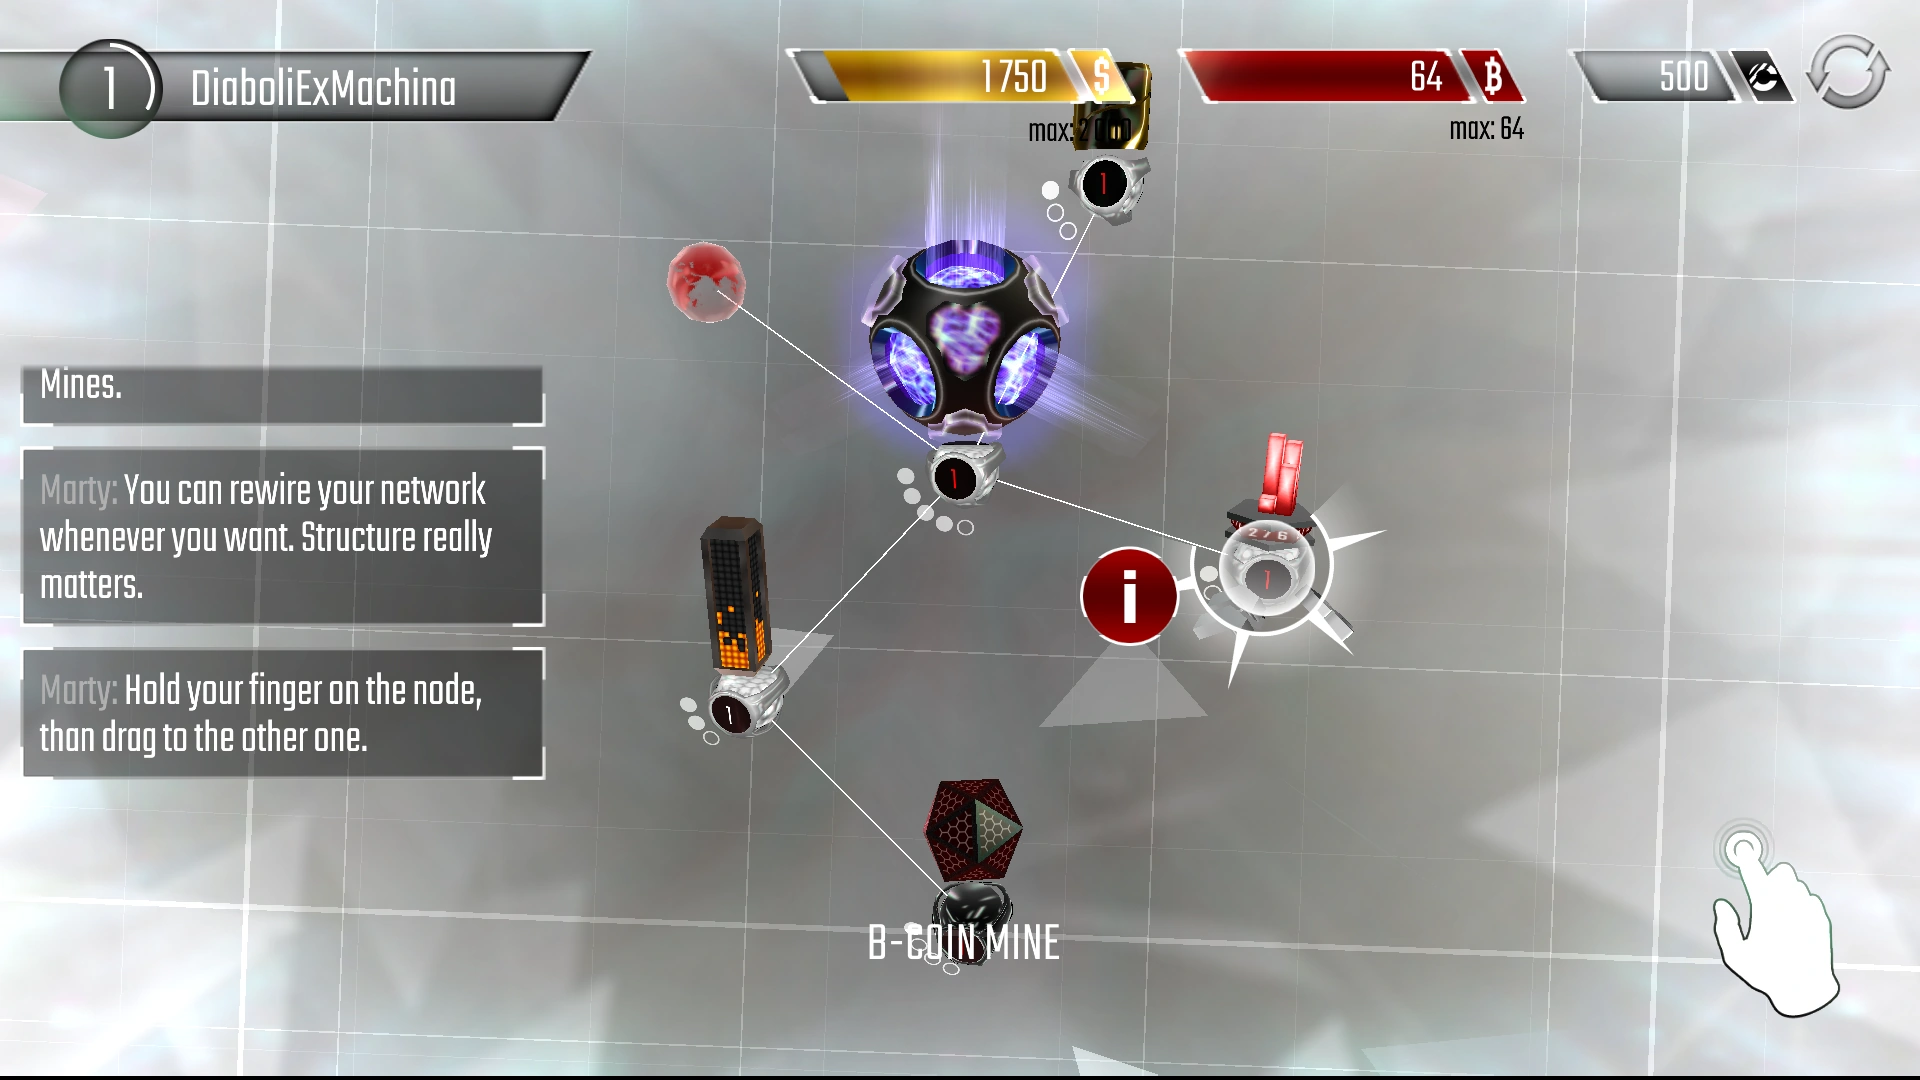
Arranging your Network! Once this is complete, Marty will explain how to restructure or "Rewire" the network. This can be done by holding a node, dragging the line which appears to another node, and releasing. Nodes can be disconnected in the same fashion!
Nodes have a limited number of connection slots, which are represented similarly to program slots except by circles instead of rectangles. When all the connection slots are filled on a node, it can still be dragged around but cannot be linked to any other nodes. Nodes cannot be completely disconnected except temporarily in Rebuild Mode.
Finally, use two fingers on the screen and pinch them together to zoom out, and spread them apart to zoom in. Use a single finger and swipe or move to adjust the viewing orientation.
Building and designing a network is too complex for the scope of this tutorial, but it is central to succeeding as a hacker. Check out Net Building to learn more.
With defence managed for the moment, build some offensive programs and find someone else to attack!
Compiling Programs[]

Building a Compiler!
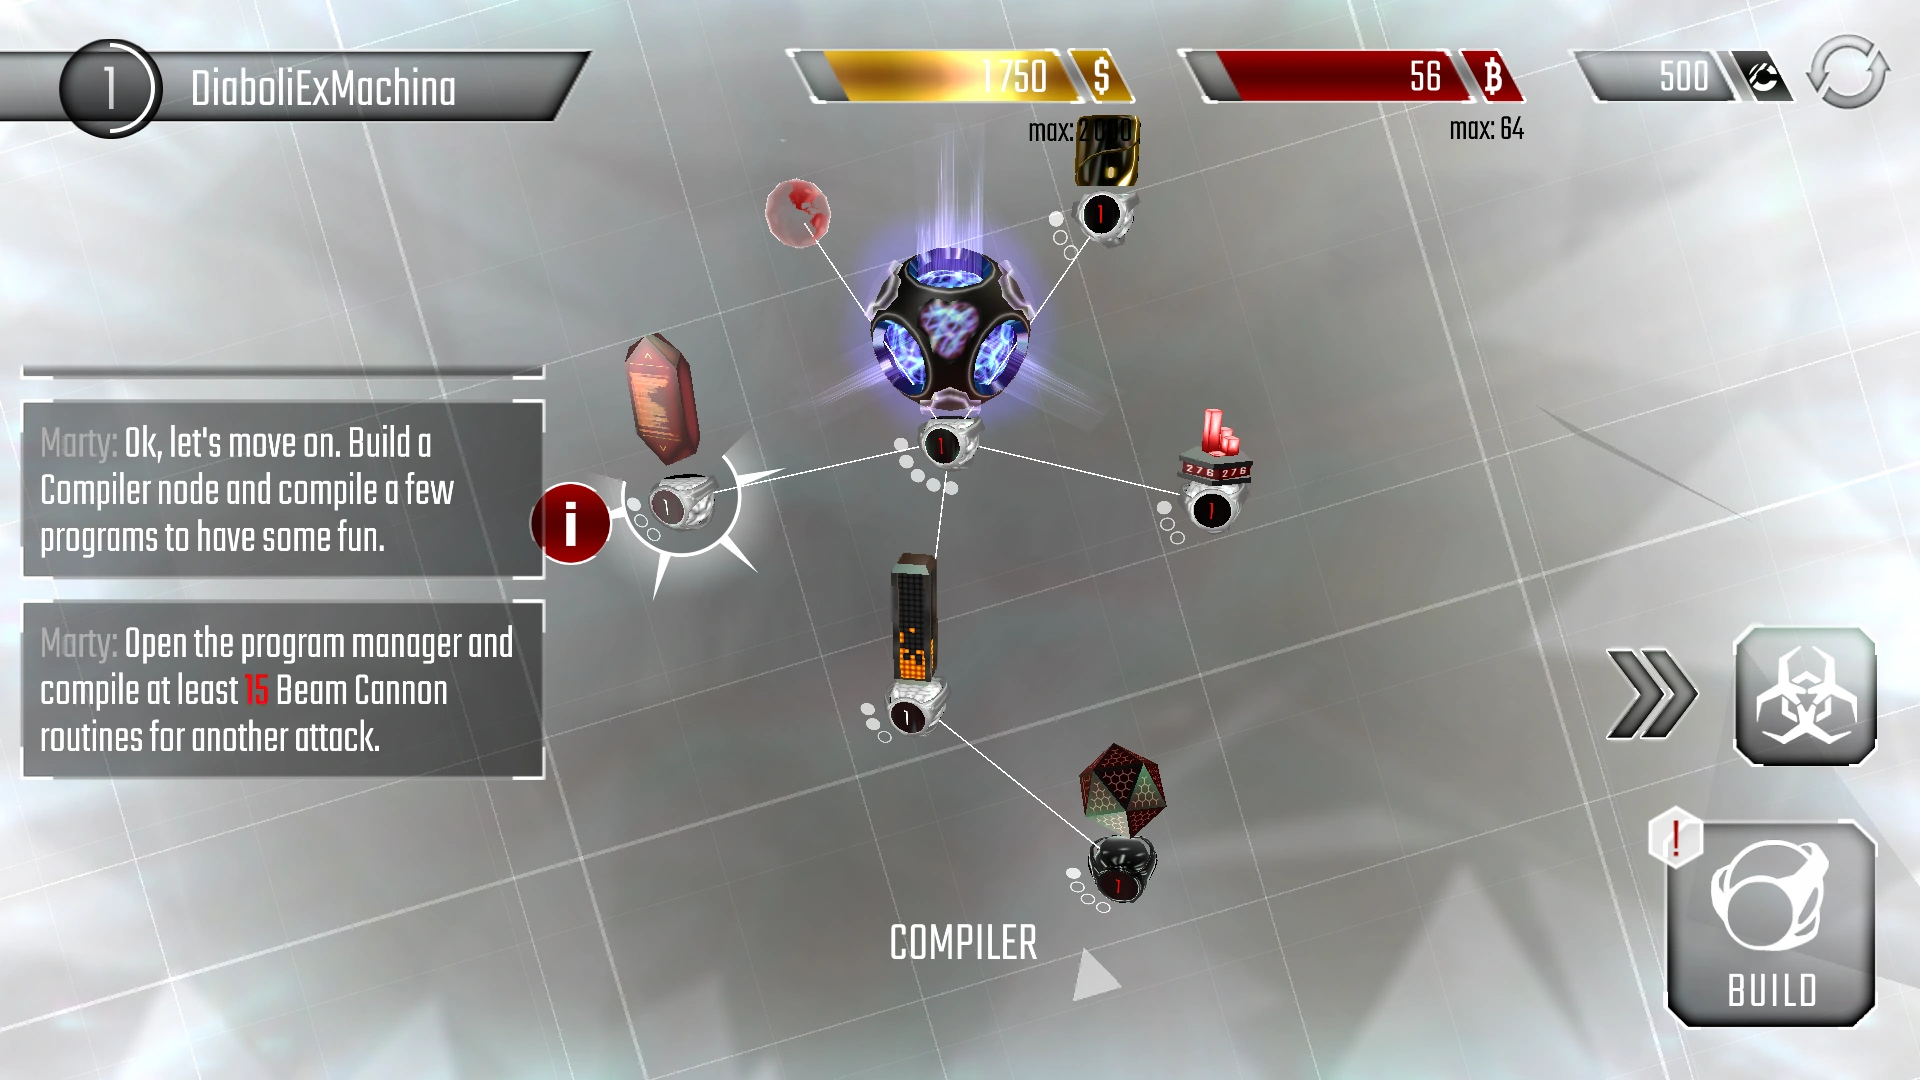
Building a Compiler! Programs must be compiled before using them to hack, which requires a Compiler! Build this in the same way as previous nodes. At Marty's request, compile 15 Beam Cannon programs for the next target. To do this, press the "Virus" button that is highlighted at the right edge of the screen, and tap the Beam Cannon icon until 15 Beam Cannons are in production. This process, as well, can be completed with credits instantly by pressing the "Finish" button in the bottom right.
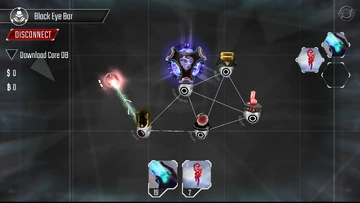
Finding Targets[]

Finding new Targets!
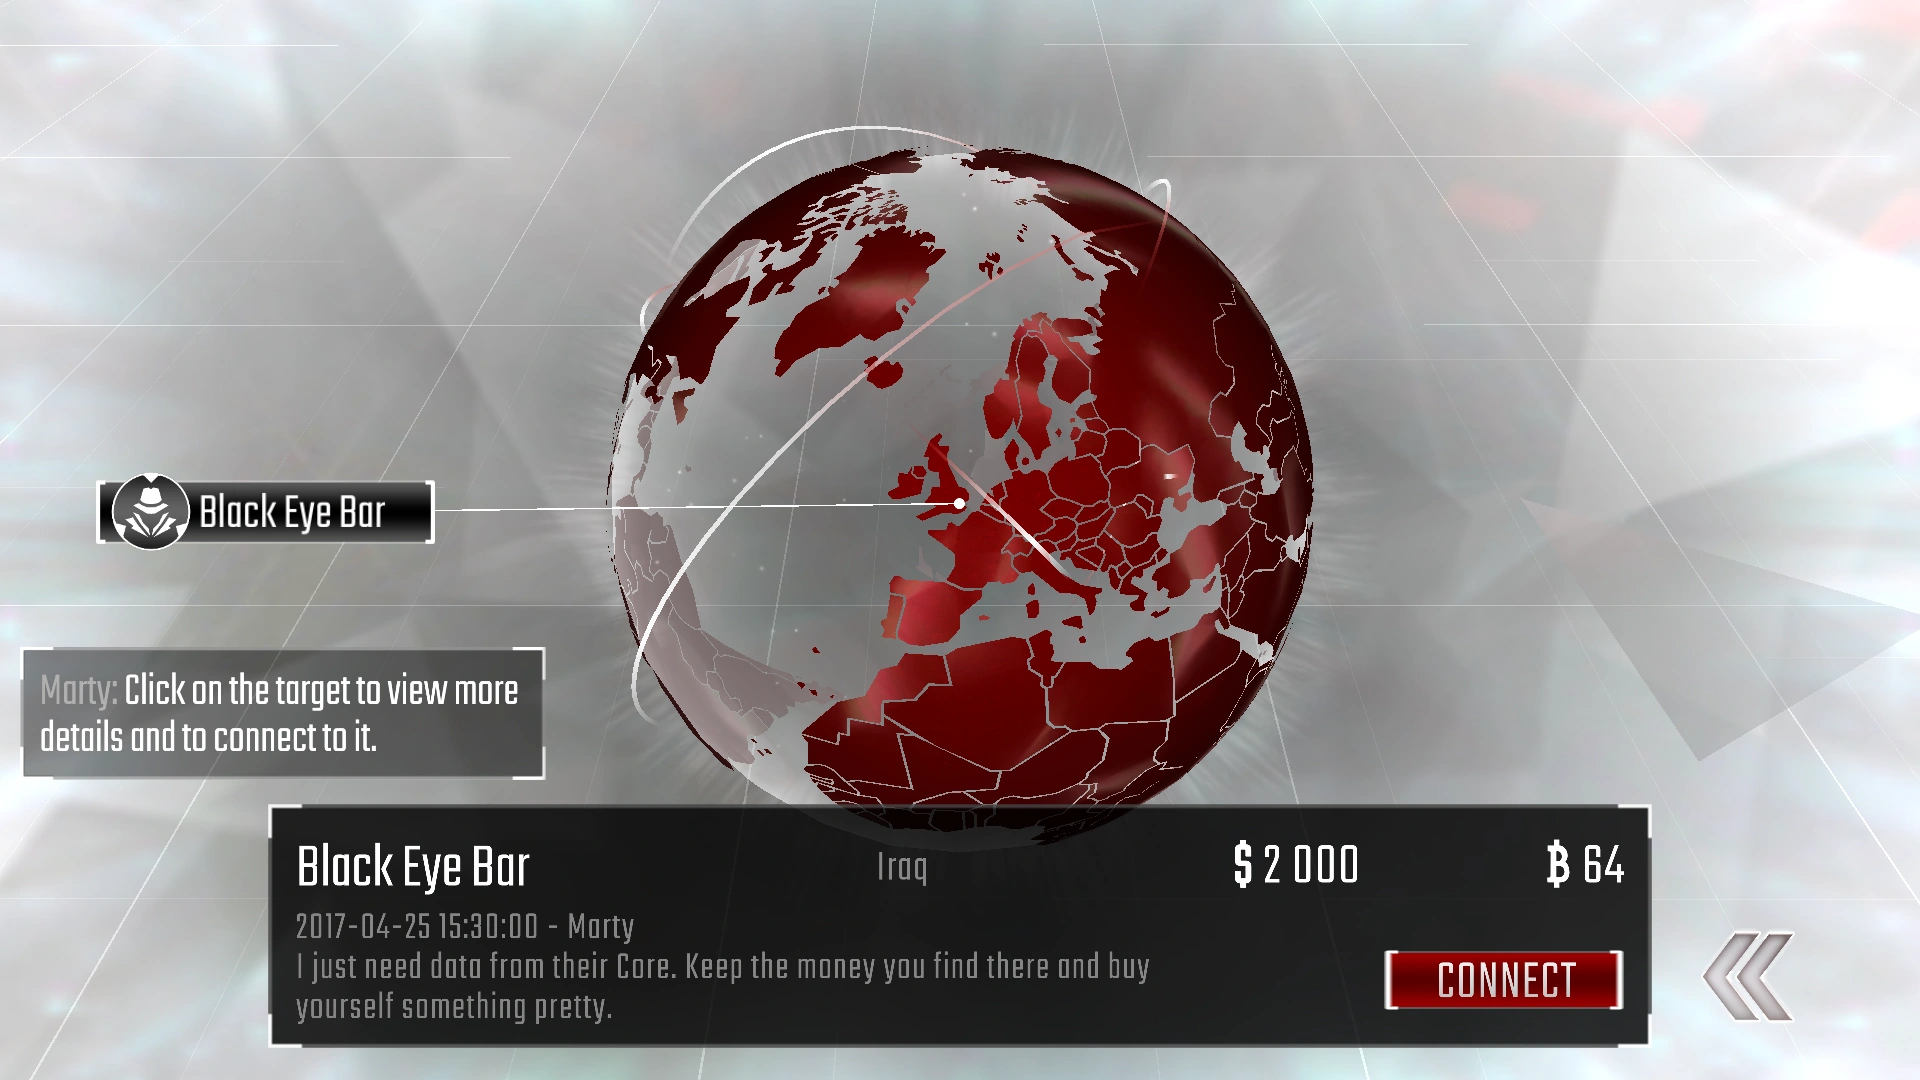
Finding new Targets! Once the Beam Cannons have finished compiling, Marty will explain how to find someone to hack! Select the “World” button which has appeared. The World Map will open, where there is a new Mission - Black Eye Bar. Mission tags have a black background, whereas player networks will have red tags. Selecting a tag will display additional information at the bottom of the screen, such as the location of the target and the amounts of available resources. Connect to the network in the same way as before, by selecting the tag and tapping "Connect."
Upgrades[]
New Programs[]
A new program appeared!
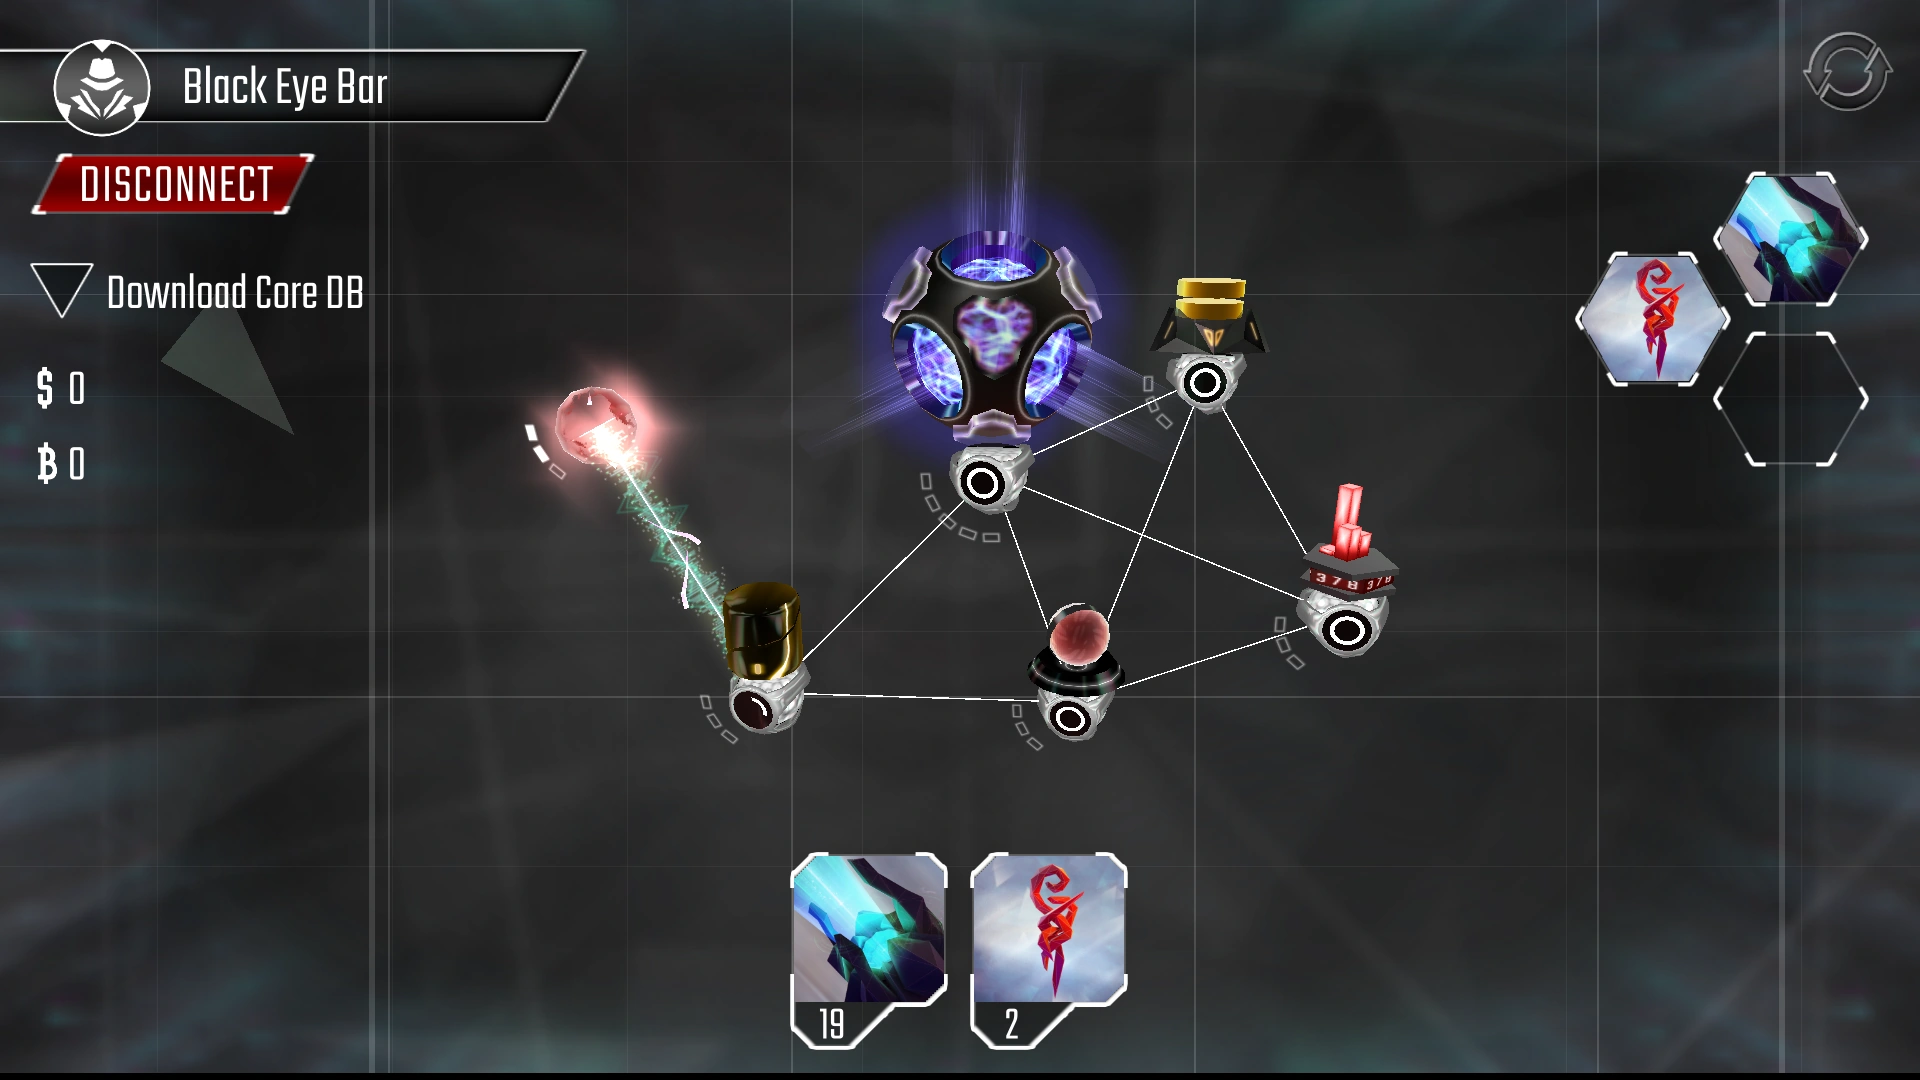
A new program appeared! Upon connecting to the Black Eye Bar network, there will be some additional free programs - Worms. These programs will replicate themselves when they are not attacking, so they can spread throughout the network. They will not remain available for future hacks, so enjoy them now by installing one on the netConnection. They are weak compared to Beam Cannons, but will steadily attack, then replicate, and eventually take over the entire network! With the mission complete, there is more loot for more upgrades!
Bigger and Faster Building[]
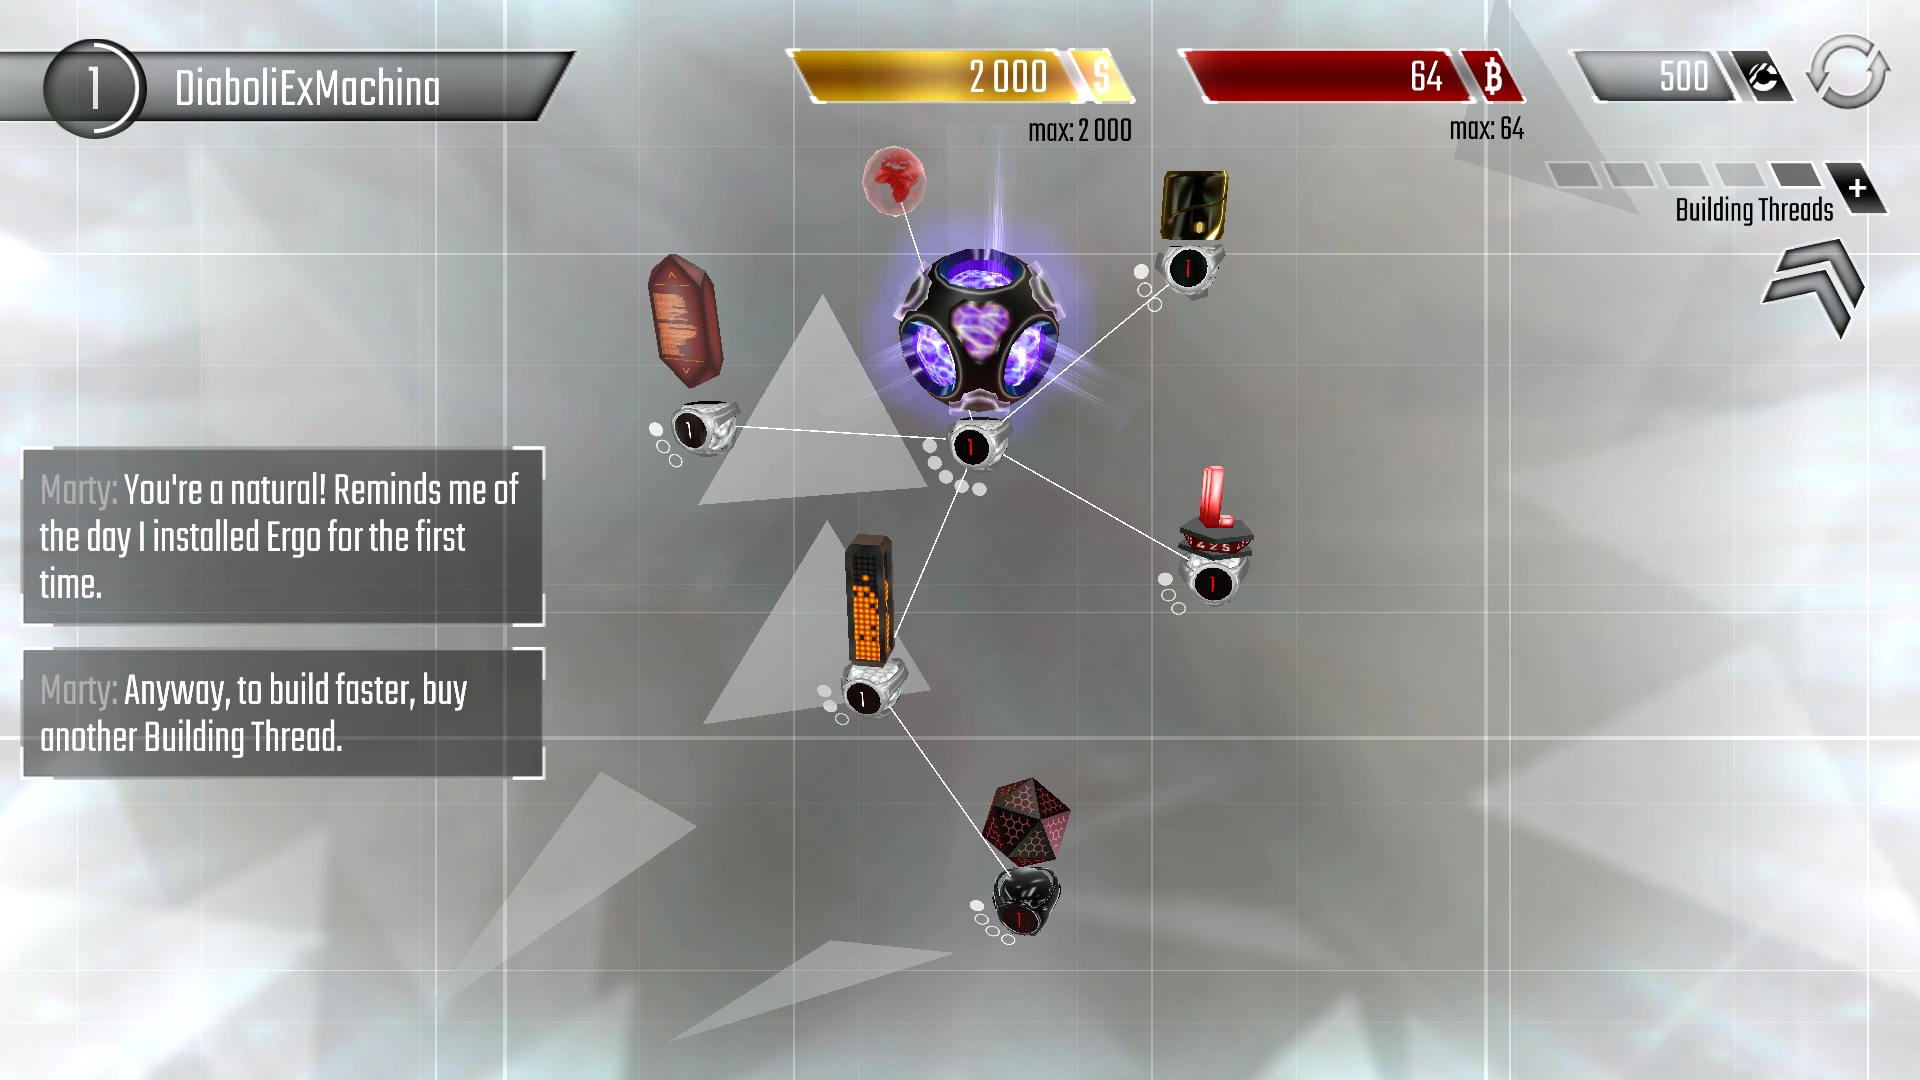

More Building Threads!
More Building Threads! The missions have provided enough resources to upgrade the Core! But first, take Marty's advice and buy an extra Building Thread. These enable multiple nodes to be upgraded or built at the same time, or to speed things up by using more than one on a single construction. Click the "+" button located to the right of the Building Threads indicator and select "Yes" to purchase one with the credits provided. Now there will be two dark blocks - these represent available Building Threads, waiting to be put to work! The blocks turn white when they are busy, and the translucent ones are additional threads which can purchased, with sufficient credits.
More Nodes[]
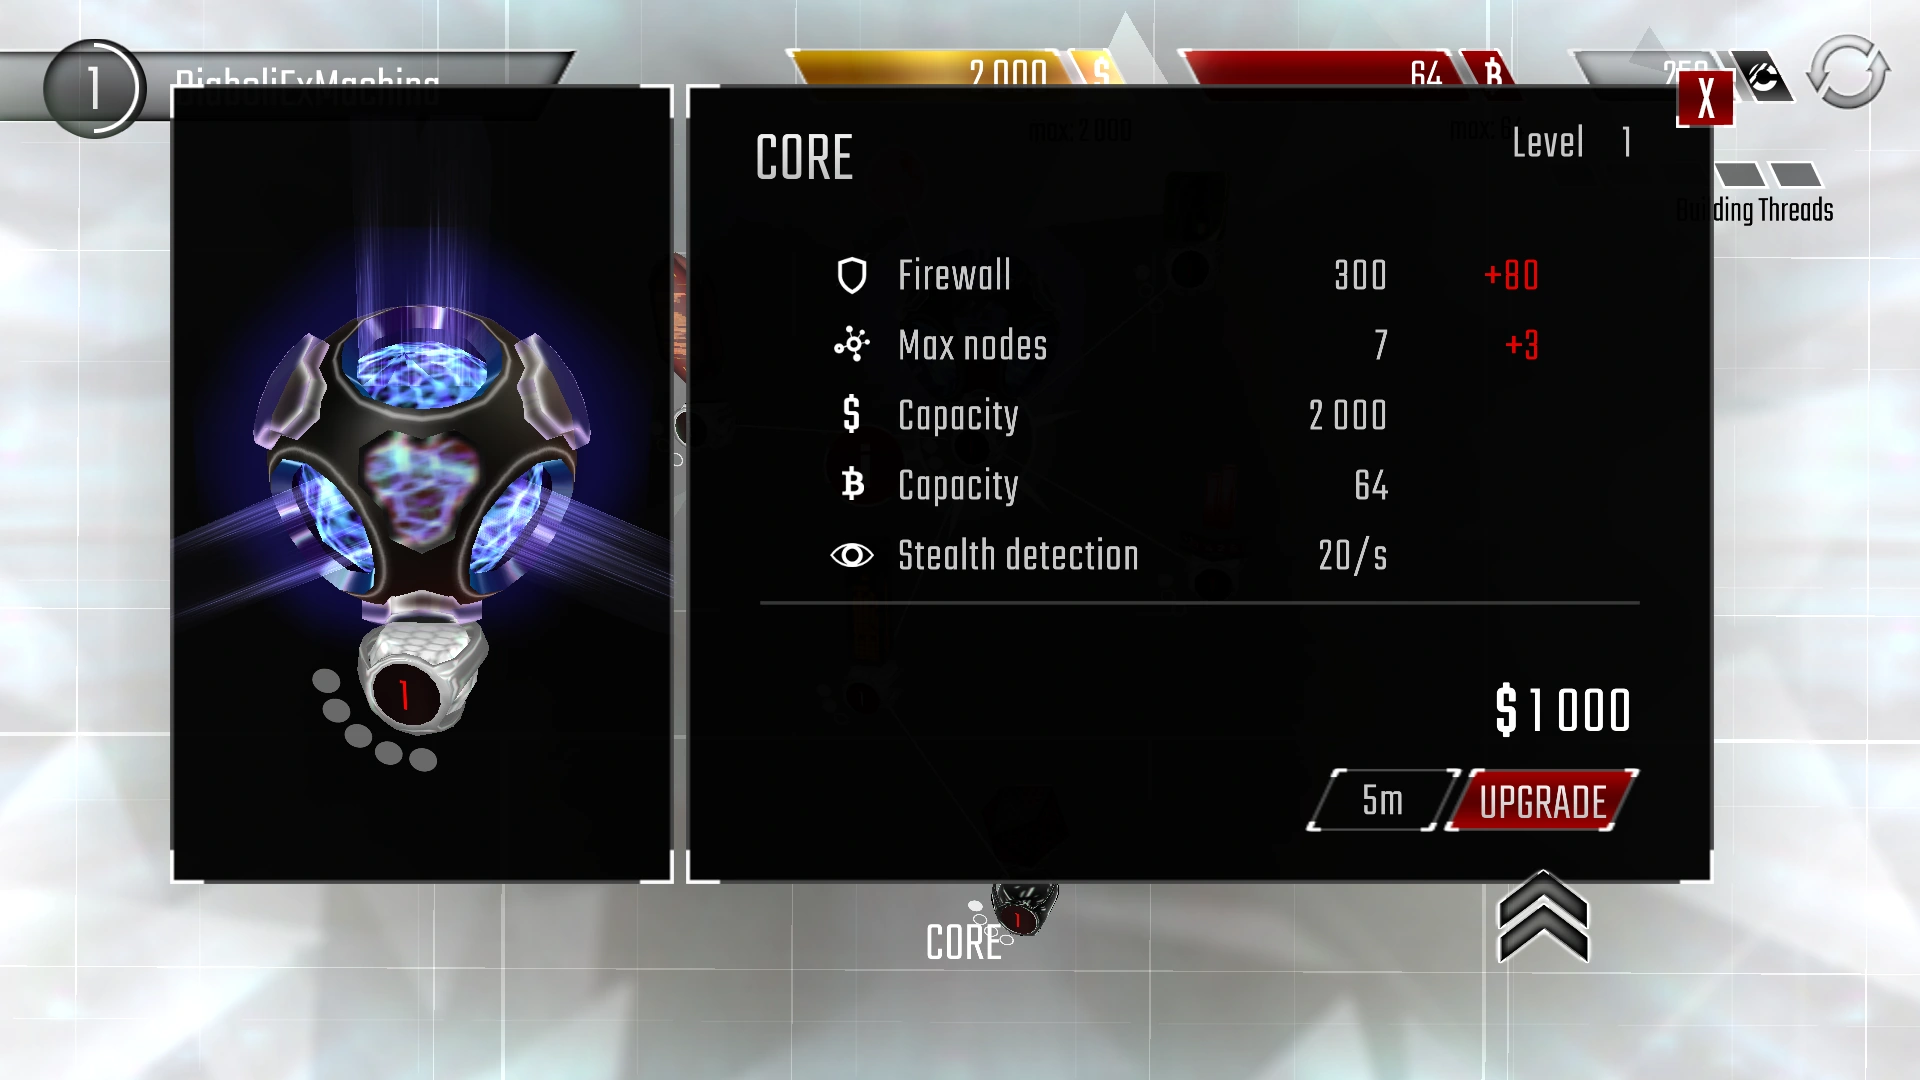

Upgrade your Core!
Upgrade your Core! Select the Core and press the "i" button to view some additional information, including the time and cost to upgrade. Pressing the "Upgrade" button to start the process will automatically assign one of the Building Threads to the upgrade, as shown by the indicator. To assign another thread to work on the Core, tap the timer that is displayed. The upgrade time is now reduced by half, and will be completed twice as quickly! Notice that both the upgrade timer and Building Thread indicator display two white blocks. This means that two threads are assigned to the upgrade. To remove a thread, simply tap the Core again. Note that once a construction is processing, at least one Building Thread must be assigned at all times, until the upgrade is completed or cancelled.
More Resources[]
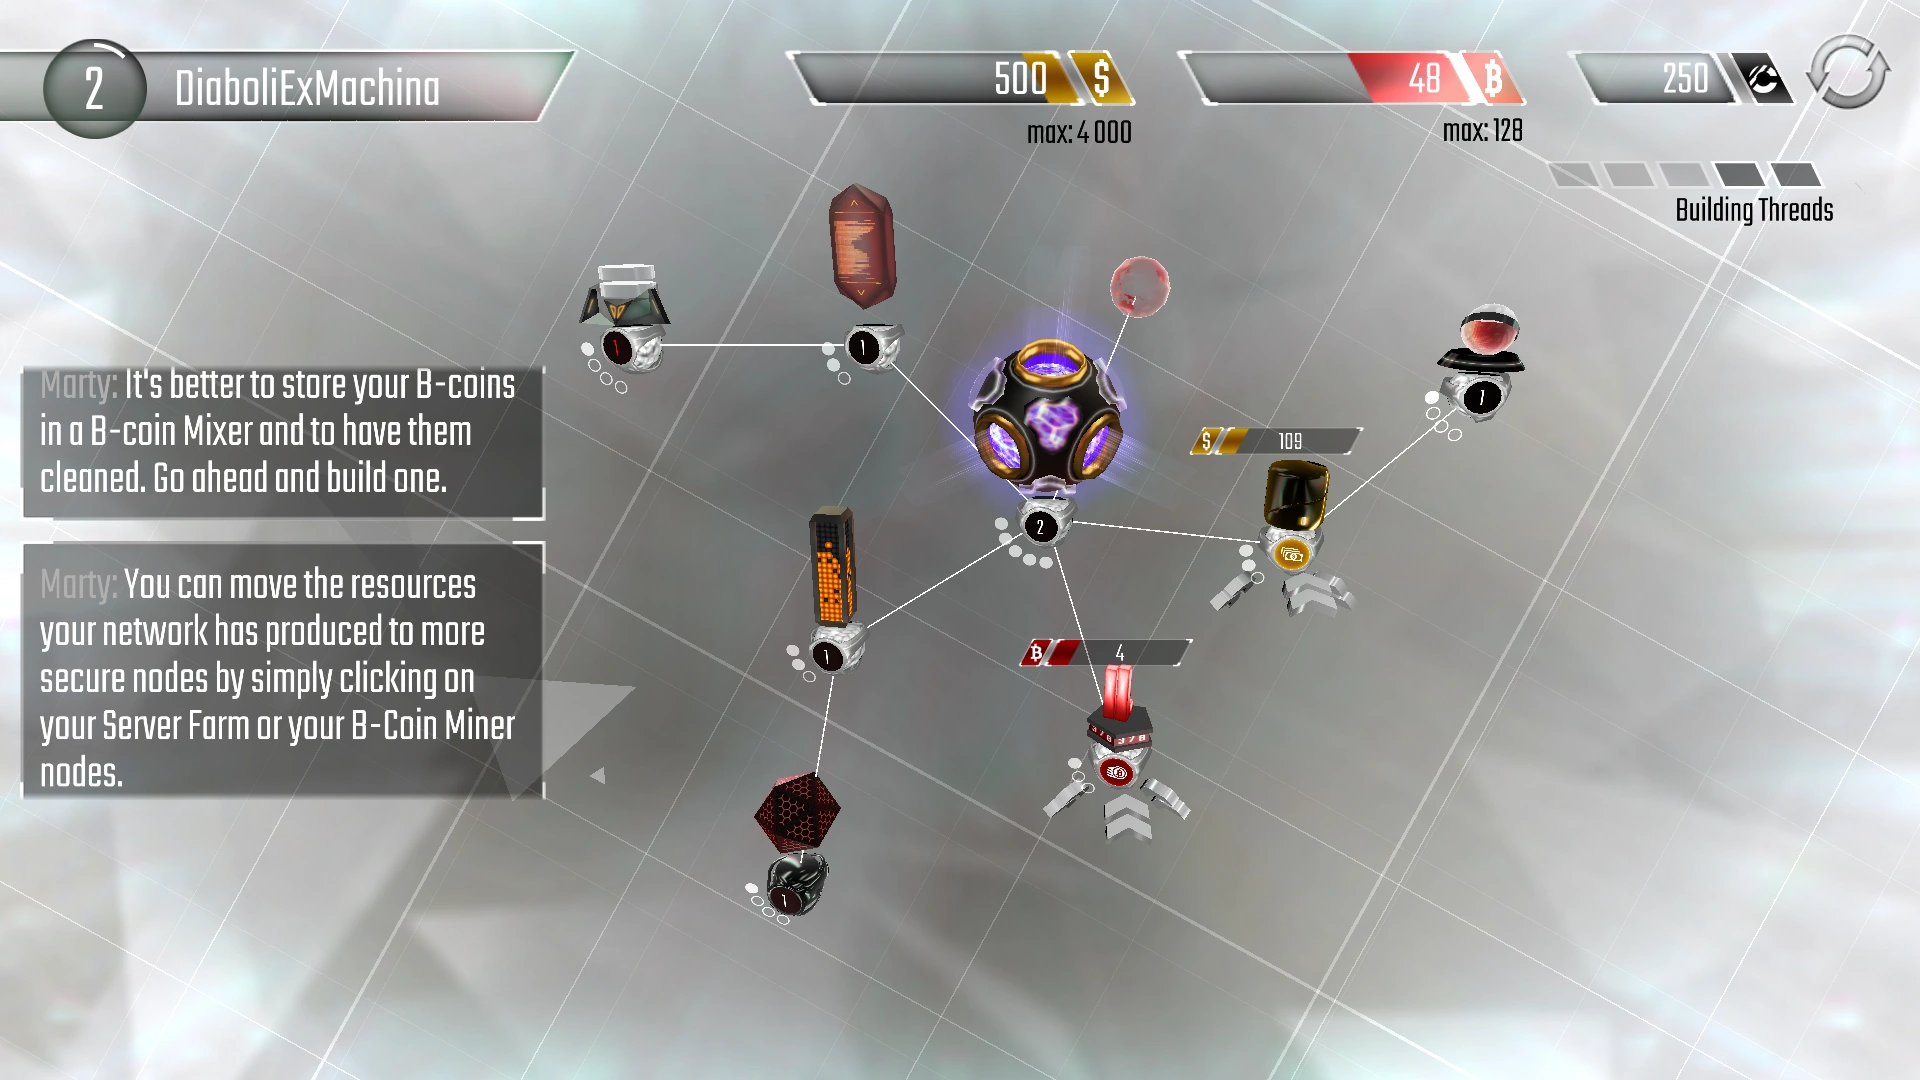

More Resources!
More Resources! Once the upgrade is complete, the Core info will reveal that $8,000 is required to upgrade it to the next level - but it can only hold $2,000! Luckily, upgrading the Core has provided a few benefits, including the ability to have more nodes. Now there is space to build resource storages - a Database for money, and a B-coin Mixer for B-coins. Build one of each, the same way as before. When these are complete, both the Server Farm and B-coin Mine will have produced some resources, as shown by the gold and red bars which appear above each of them. Tapping the bars will collect the resources to storage, as shown by the indicators at the top of the screen. Resources must be collected first before they can be spent on anything.
Better Programs[]
The final node mentioned in the tutorial is the Evolver. This is used to develop new programs once they are unlocked, and then upgrade them. To open the Evolver, tap the "Virus" button and select the tab labelled "Develop Programs" at the top. Take a look at the range of programs available in Hackers! Tap the "i" button to view more information about a program, or tap the program card to develop or upgrade them. When the Evolver is working on a program, the program will be shown in the space to the right, and a timer will display above the Evolver node. Developments and upgrades can be finished instantly with credits by tapping the “⏩” button below the program in the “Developing:” box.
After browsing the various programs, Marty suggests building more programs before finding bigger and better targets to hack!
More Targets[]


Even more targets!
Even more targets! Returning to the World Map will now reveal an empty globe. Pressing the “Search” button will cost a small amount of money, and will retrieve 5 random target networks. They will usually have similar reputation and network level, to ensure a manageable hack, but profit and difficulty can still vary dramatically, especially at higher levels.
Upon connecting to a network, a timer at the top-center of the screen will begin counting down from 30 seconds. If this timer reaches 0, or if any programs are installed, a hack will begin. Disconnecting before this happens will return to the World Map and the network will remain available. However, disconnecting after a hack begins will open the Home Screen, and the World Map will no longer list that network among the available targets. Pressing the Search button will present five new targets in place of any which remained.
Searching for new targets concludes the tutorial part of the game. You're now prepared to join the cyberwar!
Use the programs compiled earlier to attack these new networks and loot resources! Once a hack is finished, head back to the Home Screen, compile more programs, upgrade any nodes and programs desired, and then hack some more!
Frequently Asked Questions[]
- I changed my mind about my name or location. How do I change them?
- I can't move my nodes where I want to, and moving them is a pain.
- Go to the Home Screen, select the "Build" button in the bottom right corner, and then press the "Rebuild" button that appears in the upper left corner. This is Rebuild Mode, where nodes can be completely detached and dragged around much easier. All connections can be severed at once by pressing “Detach” at the bottom of the screen, and any changes can be either saved or discarded by pressing “Save” or “Cancel,” respectively. Remember that the network must not break any rules before it can be saved, so be sure that all nodes are linked within 9 steps of a netConnection. The “Save” button at the bottom of the screen will turn red when the network is valid, so feel free to experiment.
- I'm missing a building thread!
- Check any currently constructions for the white blocks that are displayed underneath the timer on an upgrading node. Each white block represents a single building thread. To remove and add threads, tap on the timer above the node.
- I made a mistake and need to delete a node!
- Nodes cannot be deleted if that would result in the network becoming invalid in some way, and they cannot be deleted while in Rebuild Mode. Moving the node to the end of the network usually allows the node to be deleted. Note that essential nodes, such as the Core or Compiler, can never be deleted.
- I could not connect because my “network is under heavy load from an unknown attacker” or I got disconnected because my “connection has been hijacked!”
- If you see the first message while logging in, it means someone is currently connected to your network. You will be able to reconnect once they have disconnected. If you were currently playing when you saw the second message, take a break! Other players can find and connect to your network after you have been online for 3 hours consecutively.
| Hackers Wikia - Gameplay Topics | ||
|---|---|---|
| Gameplay | Nodes | Programs |
| Hacking |
World Map • Hacks • Missions • Network Logs • Simulations • Reputation | |
| Networking |
Home Screen • Net Building • Resources • Black Market • Patch Notes | |
| Strategies |
Getting Started • Offensive Strategies • Defensive Strategies • Game Tips | |